Earth without art is just “eh”. By taking away creativity, we’re left with something pretty bland. Thankfully, we have art, and it’s here to stay. Let’s discuss a unique form of art that keeps the world spinning. It is known as calligraphy. We have been writing for thousands of years, yet how can you master this universal art? Let’s break down the many types and ways.
What Is Calligraphy?
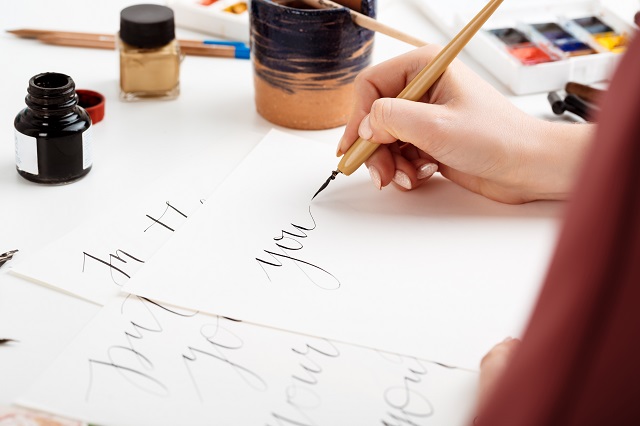
As described earlier, it’s an art form. But specifically the art of beautiful handwriting. I am not one with beautiful handwriting, but like anything else, it can be learned, so you can give a loved one a beautifully written note from the heart. Let’s get started with what you need.
Must Have Supplies
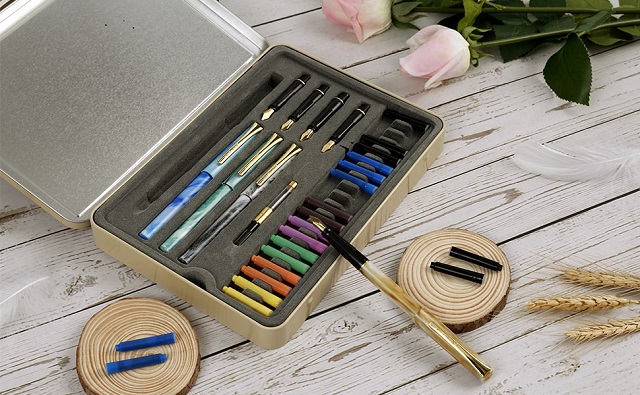
When we embark on a new project, we may feel many emotions. Do you feel excited, overwhelmed, or confused? Here are the exact supplies for calligraphy you need.
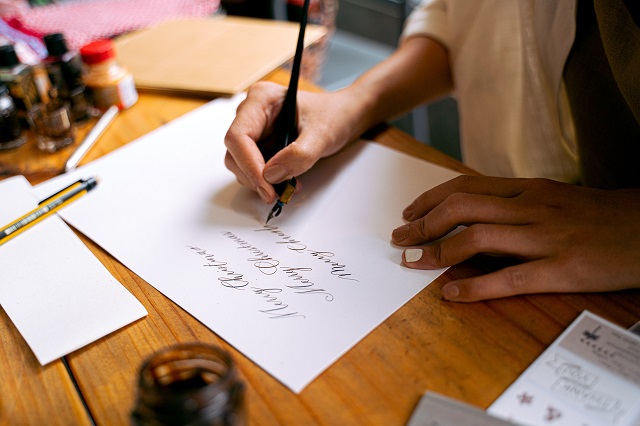
- Pens: To name a few, you need a soft brush nib, a medium-tip marker for bolder lines, and an ultra-fine marker for thinner lines. These come waterproof, permanent, odourless, acid-free and don’t bleed through paper
- Paper: White cotton paper that doesn’t bleed is ideal. However, you can find a calligraphy practise book with built-in lines to keep you in order.
- Pencils: Though calligraphy is often done with a pen, it’s also possible to use pencils graded HB, B, or 2B because they have soft graphite cores.
- Ruler: Especially while you are still mastering this art, you need a ruler to help you keep a consistent size for your lettering. For calligraphy, eyeballing it, isn’t enough.
- Eraser: You need this to fix any little mistakes, but you want one that will not damage the paper or any lines near it.
- Ink: You may find ink in colours such as black and blue. These are the traditional colours; however, there are thousands more for you to play around with.
This is a non-exhausted list of must-have supplies for calligraphy. You can keep going to find the pen that feels right in your hand.
Traditional vs. Modern
All over the world, there are many types of calligraphy: Western calligraphy, Eastern calligraphy, Arabic calligraphy, and Islamic calligraphy. These vary not only in where they originate but also in style.
The most popular style is called copperplate script, which is highly slanted, elegant, and flowy. This is a traditional style of calligraphy. This is where you need your ruler since this is meant to be done with precise heights and angles. Traditional calligraphy is very slanted, with neutral colour, and a normal letter form.
To master it, you will need a pen, nib, holder and ink. The angle you hold the pen is key to how thick or thin your lines are. The higher you hold the thinner. The lower the paper the thicker. This is why bleed-resistant paper is important.
Modern calligraphy has such characteristics as loopy letters, bright colours, and a bouncy layout to name a few. This style is much easier to learn because it is free-flowing and more open for artist interpretation.
Modern calligraphy is used mostly with brush pens. Compared to traditional pens, brush pens are much easier to learn with less practice and the same results.
How to Use Your Tools
Does it matter which angle I hold my pen? Yes, it does matter. The placement of your pens should be a smooth operation. You don’t want to have a tight hand. Sometimes you need more pressure and at other times you don’t need any at all.
It is best to hold your pen at about 45 degrees, if it’s too high you run the risk of damaging your pen tip. Remember this, for thin strokes you need to move up with no pressure, for thick strokes you want to move down with pressure. Keep practising these ways so your brain can latch on to the idea.
How can we get those beautiful circles and straight lines? Practice still is always the key. Practice these strokes below to become a master.
- Downstroke;
- Under-turn and over-turn strok ;
- The compound curve which you need to connect your little “n’s”;
- Ascending and Descending loops for “l and j”;
- Oval stroke for the perfect “o”.
These strokes can be mastered easily by everyone. Before you know it you will be able to do them quickly and without thinking. Remember, you want to be consistent with straight lines and even angles. If your “a” is high so should be your “b” and so on.
To Sum Up
Calligraphy is great to use for a bullet journal when you want to write down that must-try and soon-to-do goals. You can also use calligraphy for handwritten notes and cards for your loved ones. This can turn into its own business once you master the many ways to lay a pen to paper.